
How to install tongue & groove wall boards
Posted: March 30, 2026Author – Ryan Palma Owner/CEO Sustainable Lumber Co.
Click on these links to view our extensive line of sustainable wood wall & ceiling boards, or email us for a pricing quote, or call us at (406) 642-7120
How to Install our Beetle Kill Pine Tongue and Groove Wall Paneling: A Step-by-Step Guide
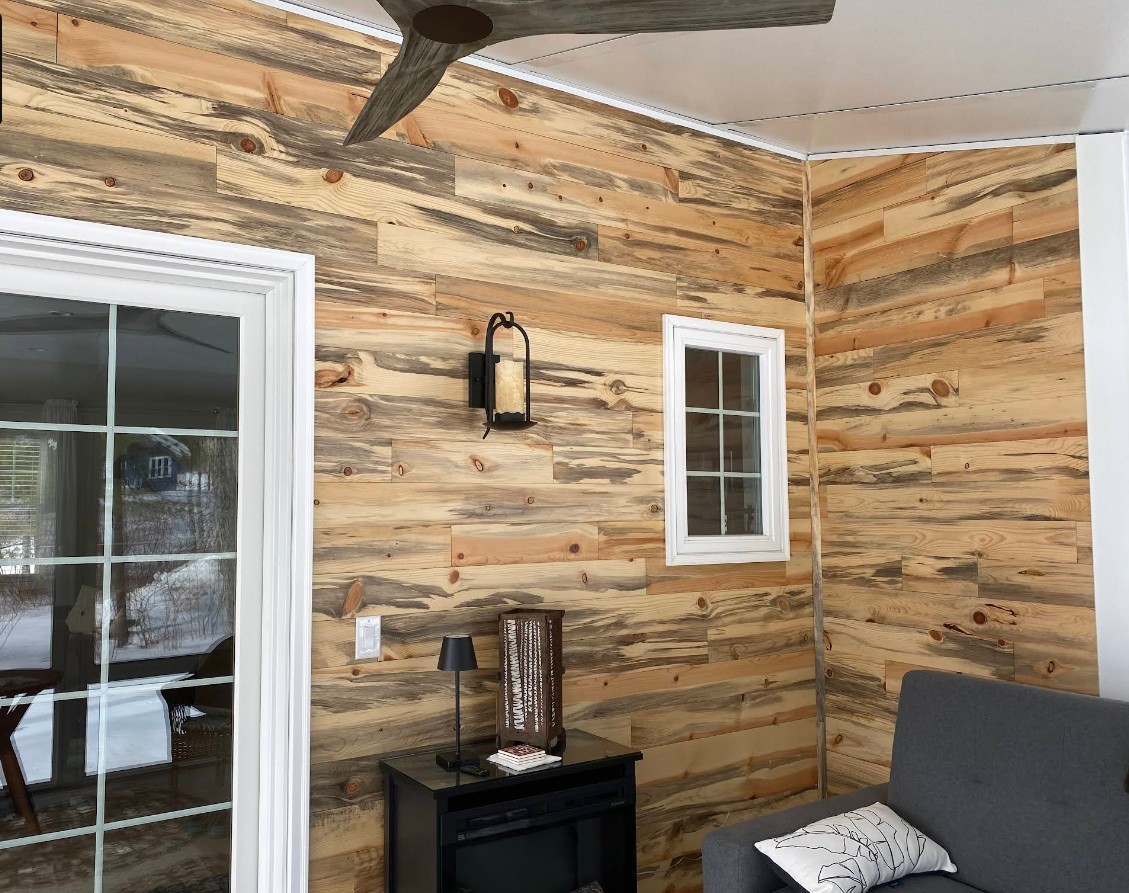
 Beetle Kill Pine (often called Blue Stain Pine) offers a beautiful, eco-friendly way to add rustic character to your interior walls. The distinctive blue gray tones come from mountain pine beetles that kill lodgepole pine trees, yet the wood remains structurally sound and is sustainably salvaged. At Sustainable Lumber Co., this material turns a forest challenge into stunning, one-of-a-kind paneling.
Important Note: This guide is based on the official Beetle Kill Pine Wall Paneling Installation Guide from Sustainable Lumber Co. It’s provided for reference only, the installer is fully responsible for proper installation. Always comply with local building codes and regulations. This product is designed exclusively for normal, dry interior environments and is not suitable for exterior use or high-moisture areas.
Before You Start: Essential Preparation
Proper prep prevents problems down the line. Wood is a natural, hygroscopic material, it expands and contracts with changes in temperature and humidity, so take these steps seriously.
Receiving Your Shipment
- Your order ships freight prepaid via common carrier.
- If the shipment arrives damaged, note the damage on the freight bill before signing, take photos, and contact Sustainable Lumber Co. immediately.
- Do not un-bundle the material or begin installation until any issues are resolved.
Inspection
 Carefully inspect every plank before installation to confirm it meets your expectations in color, grade, and condition.
- If you spot damage, color mismatches, or other issues, contact Sustainable Lumber Co. right away.
- Critical warning: Once installation begins, it’s considered acceptance of the product. Installed paneling is deemed visually acceptable, and the company accepts no responsibility for costs if visible defects are installed.
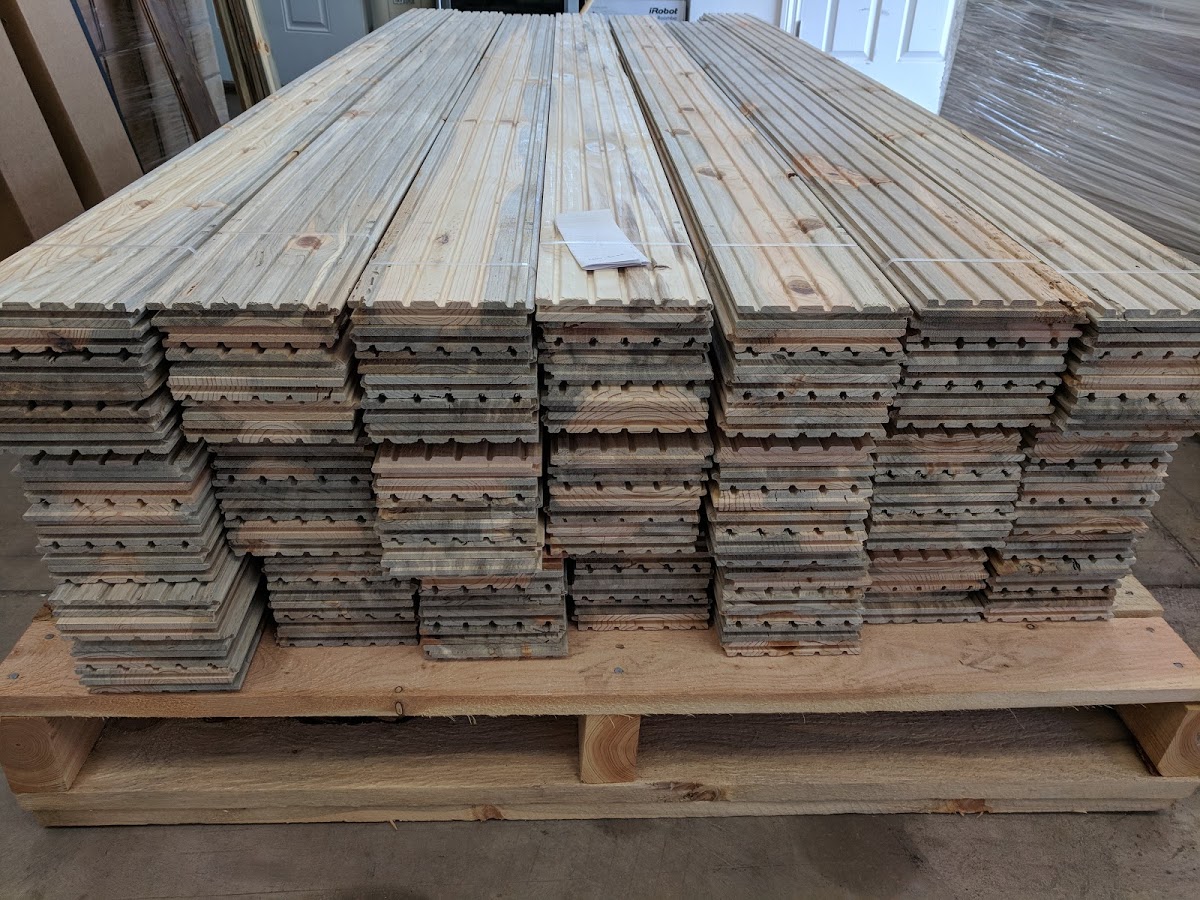
- Up to 5% of planks may have minor milling, handling, finish, or grade variations, this is standard for natural wood products.
Storage and Acclimation (Don’t Skip This!)
- Store planks indoors in a clean, dry area on a flat, level surface.
- Avoid concrete floors or exterior walls.
- Open the packaging and separate planks into smaller stacks to promote air circulation.
- Acclimate the material in the installation room for at least 72 hours before starting work. This allows the wood to equalize with the room’s moisture content.
Jobsite Conditions
 Finish all wet work (plumbing, drywall mudding, painting, etc.) and let everything fully dry.
- Install paneling as one of the last steps in new construction or remodeling.
- Ensure HVAC is running and maintaining normal occupancy conditions: 60–70°F (15–21°C) and 35–55% relative humidity for at least one week before, during, and after installation.
- Never install in areas prone to high moisture like bathrooms, without ventilation and dehumidification.
- Sustainable Lumber Co. is not responsible for failures caused by poor jobsite or substrate conditions.
Tools You’ll Need
- Stud finder
- Pencil
- Level
- Nail gun (with appropriate finish nails)
- Miter saw (for end cuts)
- Table saw (for ripping the final row to fit)
Step-by-Step Installation Instructions
 This paneling uses a classic tongue and groove system for a clean, hidden-fastener look.
- Locate and Mark Studs – Use a stud finder to locate wall studs. Draw vertical lines from floor to ceiling with a pencil and level so you know exactly where to nail.
- Start the First Row – Position the first plank with the tongue facing up. Angle finish nails through the tongue at each stud crossing (nail at a 45-degree angle so the next board covers the nail head).
- Build Subsequent Rows – Take the cutoff piece from the end of the previous row (if long enough) and use it to start the next row, this helps stagger seams naturally. Slide the groove of the new plank over the tongue of the previous one, locking them together. Again, nail through the tongue at a downward angle at each stud location (this hides the fasteners under the next board’s groove).
- Repeat and Stagger – Continue across the wall, row by row, maintaining consistent stagger for strength and aesthetics.
- Finish the Top Row – For the final row near the ceiling, measure and rip the plank lengthwise on a table saw to achieve a perfect fit. Install as before.
Pro Tip: Work from the bottom up. The angled nailing method (blind nailing) creates a seamless appearance with no visible fasteners on the face.
Final Thoughts & Best Practices
 Always read the full original guide upon receipt (available on the Sustainable Lumber Co. website).
- Work in a conditioned space to minimize movement after installation.
- Enjoy the unique natural color and character.

Beetle Kill Pine paneling brings warmth, sustainability, and a touch of the wild indoors. Installed correctly, it will look beautiful for years.
Ready to get started? Visit Sustainable Lumber Co. at www.sustainablelumberco.com or call (406) 642-7120 for expert advice.
Good luck, have fun, and enjoy your stunning new accent wall!
Contact us for a quote
Our knowledgeable team at sustainable lumber is here to answer any additional questions you may have. Call us today for a free quote on our sustainable wide plank hardwood flooring at (406) 642-7120 or click here to submit an inquiry online. We look forward to helping you with your next project!